Spring Boot load on startup
需要啟動後 執行 Bean 的 方法
1. postConstruct (建議)
2. implements initialalizingBean
2026年2月2日 星期一
Spring Boot load on startup
2022年7月19日 星期二
2022年1月6日 星期四
2021年12月22日 星期三
Spring Boot Maven Option Plugin
Spring Boot Maven Option Plugin
資料來源:
https://www.1ju.org/spring-boot/hello-world-example-thymeleaf
        <!-- hot swapping, disable cache for template, enable live reload -->
        <dependency>
            <groupId>org.springframework.boot</groupId>
            <artifactId>spring-boot-devtools</artifactId>
            <optional>true</optional>
        </dependency>

        <!-- Optional, for bootstrap -->
        <dependency>
            <groupId>org.webjars</groupId>
            <artifactId>bootstrap</artifactId>
            <version>3.3.7</version>
</dependency> 2021年12月21日 星期二
2021年12月20日 星期一
2021年12月8日 星期三
Getting Started on Heroku with Java (改) Local Start With Postgressql
Getting Started on Heroku with Java (改) Local Start With Postgressql
照著教學 跑完 git 後
改
application.properties
#spring.datasource.url: ${JDBC_DATABASE_URL:}
spring.datasource.url=jdbc:postgresql://127.0.0.1:5432/myapp
spring.datasource.username=myapp
spring.datasource.password=myapp

spring.datasource.hikari.connection-timeout=30000
spring.datasource.hikari.maximum-pool-size=3

spring.thymeleaf.mode=HTML

logging.level.org.springframework=INFO

spring.profiles.active=production

server.port=${PORT:5000}
Main.java
/*
 * Copyright 2002-2014 the original author or authors.
 *
 * Licensed under the Apache License, Version 2.0 (the "License");
 * you may not use this file except in compliance with the License.
 * You may obtain a copy of the License at
 *
 *      http://www.apache.org/licenses/LICENSE-2.0
 *
 * Unless required by applicable law or agreed to in writing, software
 * distributed under the License is distributed on an "AS IS" BASIS,
 * WITHOUT WARRANTIES OR CONDITIONS OF ANY KIND, either express or implied.
 * See the License for the specific language governing permissions and
 * limitations under the License.
 */

package com.example;

import com.zaxxer.hikari.HikariConfig;
import com.zaxxer.hikari.HikariDataSource;
import org.springframework.beans.factory.annotation.Autowired;
import org.springframework.beans.factory.annotation.Value;
import org.springframework.boot.SpringApplication;
import org.springframework.boot.autoconfigure.SpringBootApplication;
import org.springframework.context.annotation.Bean;
import org.springframework.stereotype.Controller;
import org.springframework.web.bind.annotation.RequestMapping;

import javax.sql.DataSource;
import java.sql.Connection;
import java.sql.ResultSet;
import java.sql.SQLException;
import java.sql.Statement;
import java.util.ArrayList;
import java.util.Map;

@Controller
@SpringBootApplication
public class Main {

  @Value("${spring.datasource.url}")
  private String dbUrl;

  @Value("${spring.datasource.username}")
  private String dbUsername;

  @Value("${spring.datasource.password}")
  private String dbPassword;

  @Autowired
  private DataSource dataSource;

  public static void main(String[] args) throws Exception {
    SpringApplication.run(Main.class, args);
  }

  @RequestMapping("/")
  String index() {
    return "index";
  }

  @RequestMapping("/db")
  String db(Map<String, Object> model) {
    try (Connection connection = dataSource.getConnection()) {
      Statement stmt = connection.createStatement();
      stmt.executeUpdate("CREATE TABLE IF NOT EXISTS ticks (tick timestamp)");
      stmt.executeUpdate("INSERT INTO ticks VALUES (now())");
      ResultSet rs = stmt.executeQuery("SELECT tick FROM ticks");

      ArrayList<String> output = new ArrayList<String>();
      while (rs.next()) {
        output.add("Read from DB: " + rs.getTimestamp("tick"));
      }

      model.put("records", output);
      return "db";
    } catch (Exception e) {
      model.put("message", e.getMessage());
      return "error";
    }
  }

  @Bean
  public DataSource dataSource() throws SQLException {
    if (dbUrl == null || dbUrl.isEmpty()) {
      return new HikariDataSource();
    } else {
      HikariConfig config = new HikariConfig();
      config.setJdbcUrl(dbUrl);
      config.setUsername(dbUsername);
      config.setPassword(dbPassword);
      return new HikariDataSource(config);
    }
  }

}
2020年11月12日 星期四
Custom Error Handling in REST Controllers with Spring Boot
https://thepracticaldeveloper.com/custom-error-handling-rest-controllers-spring-boot/
2020年10月5日 星期一
從零開始的SpringBoot框架 Chap_00環境設置
1.
安裝
JDK

VM分別
HotSpot的爸爸是 Oracle
OpenJ9的爸爸是 IBM
2.
SpringToolsSuite4下載

點擊spring-tool-suite-4-4.8.0.RELEASE-e4.17.0-win32.win32.x86_64.self-extracting.jar
解壓縮
3.
Eclipse Encode to UTF-8
Window >> Preferences >> search “Encod”
Set All to UTF-8


將lombok jar 複製到 eclipse 目錄下
修改 SpringToolSuite4.ini
最後新增一行
-javaagent:D:\eclipse-sts-4.8.0.RELEASE\lombok.jar
-startup
plugins/org.eclipse.equinox.launcher_1.5.800.v20200727-1323.jar
--launcher.library
plugins/org.eclipse.equinox.launcher.win32.win32.x86_64_1.1.1300.v20200819-0940
-product
org.springframework.boot.ide.branding.sts4
--launcher.defaultAction
openFile
-vm
plugins/org.eclipse.justj.openjdk.hotspot.jre.full.win32.x86_64_14.0.2.v20200815-0932/jre/bin
-vmargs
-Dosgi.requiredJavaVersion=11
-Dosgi.dataAreaRequiresExplicitInit=true
-Xms256m
-Xmx2048m
--add-modules=ALL-SYSTEM
-javaagent:D:\eclipse-sts-4.8.0.RELEASE\lombok.jar

啟動 sts >> help >> about
Spring Tools Suite4
看到 Lombok ,安裝完成
看到 Lombok ,安裝完成

5.
Create a Project >>
Spring Boot >> Spring Starter Project

maven 設定,可以不改

selected >> SpringWeb
Spring Boot Version >> 2.3.4

SpringBoot版本說明
PRE:
預覽版,不建議使用;
SNAPSHOT:
快照版,表示開發版本,隨時可能修改;
Mx:
里程碑版本,測試版本,發佈版本的前兆
RCx:
候選發佈版本,穩定版本,並不一定會發布
RELEASEx:
發佈版本
GA:
General Availability,正式發佈的版本。
SpringBoot可用版號與相依
6.
修改DemoApplication.java

package io.samchen.demo;

import org.springframework.boot.SpringApplication;
import org.springframework.boot.autoconfigure.SpringBootApplication;
import org.springframework.web.bind.annotation.GetMapping;
import org.springframework.web.bind.annotation.RequestParam;
import org.springframework.web.bind.annotation.RestController;

@SpringBootApplication
@RestController
public class DemoApplication {

    public static void main(String[] args) {
        SpringApplication.run(DemoApplication.class, args);
    }

    @GetMapping("/hello")
    public String hello(@RequestParam(value = "name", defaultValue = "World") String name) {
        return String.format("Hello %s!", name);
    }
}
7. 啟動測試


8.
瀏覽器測試

2019年2月11日 星期一
深入淺出SpringBoot Chapter3.2 裝配你的Bean
代碼清單3-5 User.java
代碼清單3-6 Appconfig.java
代碼清單3-7 IoCTest.java
執行結果
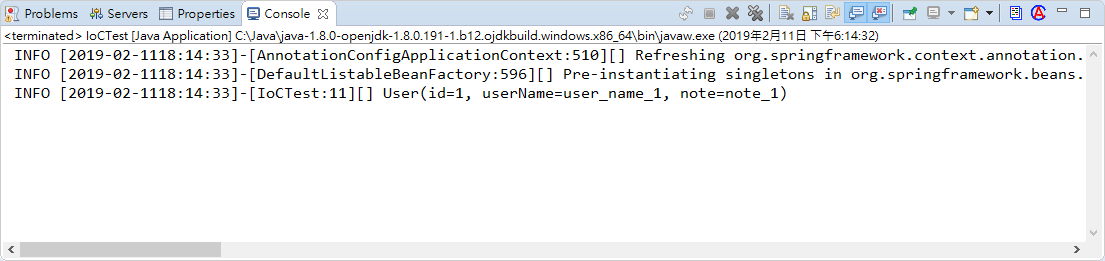
把User.java 移到 package com.spring.chapter3.pojo
改變componentScan的位置
package com.springboot.chapter3.config;
import org.springframework.beans.factory.annotation.Value;
import org.springframework.stereotype.Component;
import lombok.Data;

@Component("user")
public @Data class User {
 @Value("1")
 private Long id;
 @Value("user_name_1")
 private String userName;
 @Value("note_1")
 private String note;
}
代碼清單3-6 Appconfig.java
package com.springboot.chapter3.config;
import org.springframework.context.annotation.ComponentScan;
import org.springframework.context.annotation.Configuration;
@Configuration
@ComponentScan
public class Appconfig {

}
代碼清單3-7 IoCTest.java
package com.springboot.chapter3.config;
import org.apache.log4j.Logger;
import org.springframework.context.ApplicationContext;
import org.springframework.context.annotation.AnnotationConfigApplicationContext;
public class IoCTest {
 private static Logger log = Logger.getLogger(IoCTest.class);
 public static void main(String[] args) {
  ApplicationContext ctx =
    new AnnotationConfigApplicationContext(Appconfig.class);
  User user = ctx.getBean(User.class);
  log.info(user);
 }
}
執行結果
把User.java 移到 package com.spring.chapter3.pojo
package com.springboot.chapter3.pojo;
import org.springframework.beans.factory.annotation.Value;
import org.springframework.stereotype.Component;
import lombok.Data;

@Component("user")
public @Data class User {
 @Value("1")
 private Long id;
 @Value("user_name_1")
 private String userName;
 @Value("note_1")
 private String note;
}
改變componentScan的位置
package com.springboot.chapter3.config;
import org.springframework.context.annotation.ComponentScan;
import org.springframework.context.annotation.Configuration;
@Configuration
//可以wildcat
//@ComponentScan("com.springboot.chapter3.*")
@ComponentScan("com.springboot.chapter3.pojo")
public class Appconfig {

}
深入淺出SpringBoot Chapter3.1 IoC容器簡介
chapter3 全註解下的 SpringIoC
pom.xml
代碼清單3-2 User.java
代碼清單3-3 Appconfig.java
代碼清單3-4 IoCTest.java
log4j.properties
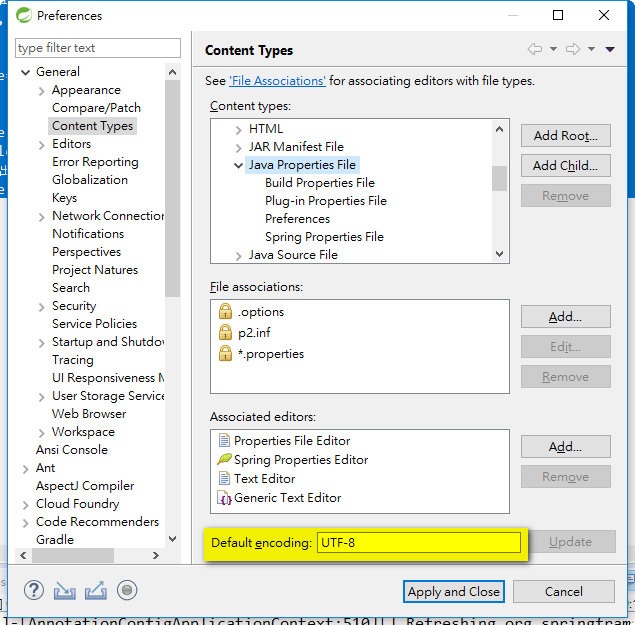
Eclipse 看 .properties 亂碼要改
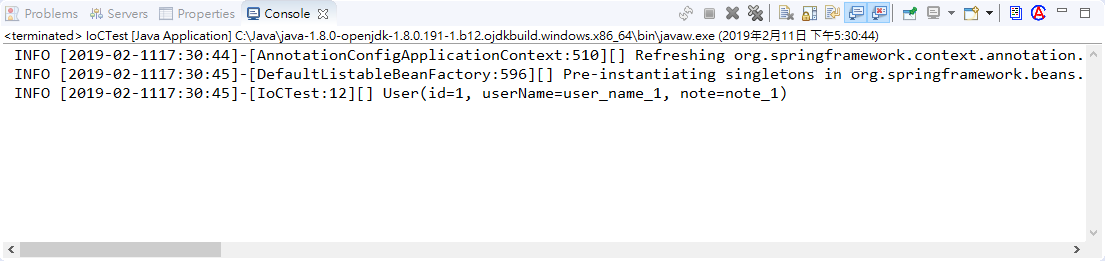
執行結果
pom.xml
 4.0.0
 org.springframework.samples
 chapter3
 0.0.1-SNAPSHOT


  1.6
  UTF-8
  UTF-8


  3.2.3.RELEASE


  1.0.13
  1.7.5


   org.springframework
   spring-context
   ${spring-framework.version}


   org.springframework
   spring-tx
   ${spring-framework.version}


   org.slf4j
   slf4j-api
   ${slf4j.version}
   compile


   ch.qos.logback
   logback-classic
   ${logback.version}
   runtime


   org.projectlombok
   lombok
   1.16.10
   provided


   log4j
   log4j
   1.2.17
代碼清單3-2 User.java
package com.springboot.chapter3.pojo;
import lombok.Data;
public @Data class User {
 private Long id;
 private String userName;
 private String note;
}
代碼清單3-3 Appconfig.java
package com.springboot.chapter3.config;
import org.springframework.context.annotation.Bean;
import org.springframework.context.annotation.Configuration;
import com.springboot.chapter3.pojo.User;
@Configuration
public class Appconfig {
 @Bean(name = "user")
 public User initUser() {
  User user = new User();
  user.setId(1L);
  user.setUserName("user_name_1");
  user.setNote("note_1");
  return user;
 }
}
代碼清單3-4 IoCTest.java
package com.springboot.chapter3.config;
import org.apache.log4j.Logger;
import org.springframework.context.ApplicationContext;
import org.springframework.context.annotation.AnnotationConfigApplicationContext;
import com.springboot.chapter3.pojo.User;
public class IoCTest {
 private static Logger log = Logger.getLogger(IoCTest.class);
 public static void main(String[] args) {
  ApplicationContext ctx =
    new AnnotationConfigApplicationContext(Appconfig.class);
  User user = ctx.getBean(User.class);
  log.info(user);
 }
}
log4j.properties
#定義 Root Logger 的等級為 INFO,且為其指定一個 appender 名為 rootAppender.
log4j.rootLogger=INFO, console

#指定 console 的類型.
log4j.appender.console=org.apache.log4j.ConsoleAppender

#指定 console 的 Layout.
log4j.appender.console.layout=org.apache.log4j.PatternLayout
#log4j.appender.console.Target=System.out
#指定 console Layout 的輸出格式.
log4j.appender.console.layout.ConversionPattern=%5p [%d{yyyy-MM-ddHH:mm:ss}]-[%c{1}:%L][%x] %m%n
Eclipse 看 .properties 亂碼要改
執行結果
2019年1月24日 星期四
SpringBoot練習1-Day 安裝好你的開發環境
SpringToolsSuite STS
https://spring.io/tools
有支援
Spring Tools 4 for Eclipse
Spring Tools 4 for Visual Studio Code
Spring Tools 4 for Atom IDE
青菜蘿蔔各有所好,
請自己選擇習慣的開發環境。
https://spring.io/tools
有支援
Spring Tools 4 for Eclipse
Spring Tools 4 for Visual Studio Code
Spring Tools 4 for Atom IDE
青菜蘿蔔各有所好,
請自己選擇習慣的開發環境。
SpringBoot練習0-Day 前言
前言
寫JAVA WEB專案到現在,
最常聽過的架構叫做 SSH,SSM
分別代表的是以下框架
Spring https://spring.io/、
Struts https://struts.apache.org/、
Hibernet http://hibernate.org/
Mybatis http://blog.mybatis.org/
有人說:『我為什麼要學習框架呢?
沒有框架,我也是可以打出一台購物車呀!』
對!但是你的購物車
可能沒有處理以下問題
1.安全性問題
2.SessionCatch問題
3.資料庫交易問題
4.權限控管問題
經過這幾年的經驗告訴我,
專案的最大敵人叫做需求變更,
當專案來到五成~六成時,
克制化需求往往也在這個時間如雨後春筍冒出來。
這時候如果沒有使用框架在開發時,
光一個小小的需求變更,
就可能造成開發時程無限前的落後。
在以前(五~六年以前),
整合各種框架是一個很痛苦的事情。
而現在Spring框架已經是一個非常穩定的產品。
所以我們一定要學習Spring框架,
才能快速架構專案的底層,
讓開發能夠專注在業務邏輯上。
寫JAVA WEB專案到現在,
最常聽過的架構叫做 SSH,SSM
分別代表的是以下框架
Spring https://spring.io/、
Struts https://struts.apache.org/、
Hibernet http://hibernate.org/
Mybatis http://blog.mybatis.org/
有人說:『我為什麼要學習框架呢?
沒有框架,我也是可以打出一台購物車呀!』
對!但是你的購物車
可能沒有處理以下問題
1.安全性問題
2.SessionCatch問題
3.資料庫交易問題
4.權限控管問題
經過這幾年的經驗告訴我,
專案的最大敵人叫做需求變更,
當專案來到五成~六成時,
克制化需求往往也在這個時間如雨後春筍冒出來。
這時候如果沒有使用框架在開發時,
光一個小小的需求變更,
就可能造成開發時程無限前的落後。
在以前(五~六年以前),
整合各種框架是一個很痛苦的事情。
而現在Spring框架已經是一個非常穩定的產品。
所以我們一定要學習Spring框架,
才能快速架構專案的底層,
讓開發能夠專注在業務邏輯上。
訂閱:
文章 (Atom)